Licensing and citation
Overview
Teaching: 10 min
Exercises: 0 minQuestions
What licensing information should I include with my work?
How can I enable others to cite my work?
Objectives
Explain why adding licensing information to a repository is important.
Choose a proper license.
Explain differences in licensing and social expectations.
Make your work citable by generating a digital object identifier (DOI) for your work
Licensing
When a repository with source code, a manuscript or other creative
works becomes public, it should include a file LICENSE or
LICENSE.txt in the base directory of the repository that clearly
states under which license the content is being made available. This
is because creative works are automatically eligible for intellectual
property (and thus copyright) protection. Reusing creative works
without a license is dangerous, because the copyright holders could
sue you for copyright infringement.
A license solves this problem by granting rights to others (the licensees) that they would otherwise not have. What rights are being granted under which conditions differs, often only slightly, from one license to another. In practice, a few licenses are by far the most popular, and choosealicense.com will help you find a common license that suits your needs. Important considerations include:
- Whether you want to address patent rights.
- Whether you require people distributing derivative works to also distribute their source code.
- Whether the content you are licensing is source code.
- Whether you want to license the code at all.
Choosing a license that is in common use makes life easier for contributors and users, because they are more likely to already be familiar with the license and don’t have to wade through a bunch of jargon to decide if they’re ok with it. The Open Source Initiative and Free Software Foundation both maintain lists of licenses which are good choices.
This article provides an excellent overview of licensing and licensing options from the perspective of scientists who also write code.
At the end of the day what matters is that there is a clear statement as to what the license is. Also, the license is best chosen from the get-go, even if for a repository that is not public. Pushing off the decision only makes it more complicated later, because each time a new collaborator starts contributing, they, too, hold copyright and will thus need to be asked for approval once a license is chosen.
Can I Use Open License?
Find out whether you are allowed to apply an open license to your software. Can you do this unilaterally, or do you need permission from someone in your institution? If so, who?
What licenses have I already accepted?
Many of the software tools we use on a daily basis (including in this workshop) are released as open-source software. Pick a project on GitHub from the list below, or one of your own choosing. Find its license (usually in a file called
LICENSEorCOPYING) and talk about how it restricts your use of the software. Is it one of the licenses discussed in this session? How is it different?
All the materials for the license section is taken directly from the Version Control with Git lesson by the software carpentry.
Making your project citable
Discussion: is depositing your data/code on GitHub enough?
- Consider the aspect of findability 5 or 10 years from now.
- What could go wrong?
There are many services where you can share or archive your code and data: See for instance our lesson on reproducible research.
In this present lesson we will discuss one of the many options to get a digital object identifier (DOI) for your dataset or code: Zenodo, A general-purpose open access repository created by OpenAIRE and CERN. Zenodo has nice integration with GitHub, and allows researchers to upload files up to 50 GB.
We will exercise in the Zenodo sandbox
We will practice on https://sandbox.zenodo.org/ and not on the “real” https://zenodo.org/ to make sure we do not create “real” DOIs which we cannot remove.
The sandbox service is useful to calibrate your setup until you are happy with the result and then you can go for the real service. Once a dataset is uploaded to the “real” service, it cannot be easily removed or modified again (and this is good, otherwise DOIs would not make much sense).
Step 1: Prepare an example repository
Through web:
- Create a new repository on GitHub
- Upload some example data into it
Or using GitHub Desktop:
- Create a new repository
- Commit some example data
- Publish your example repository to GitHub
Alternatively we can also practice this with one of the repositories we created earlier in this lesson.
Step 2: Activate the repository on Zenodo (sandbox)
We will exercise in the Zenodo sandbox
We will practice on https://sandbox.zenodo.org/ and not on the “real” https://zenodo.org/ to make sure we do not create “real” DOIs which we cannot remove.
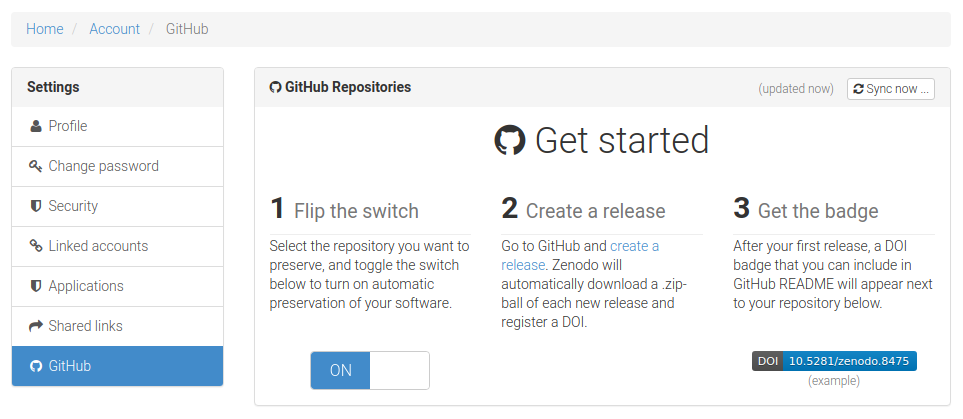
- Select the repository you wish to preserve:
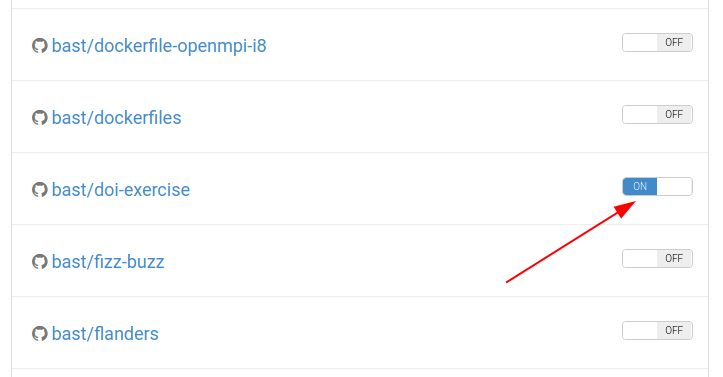
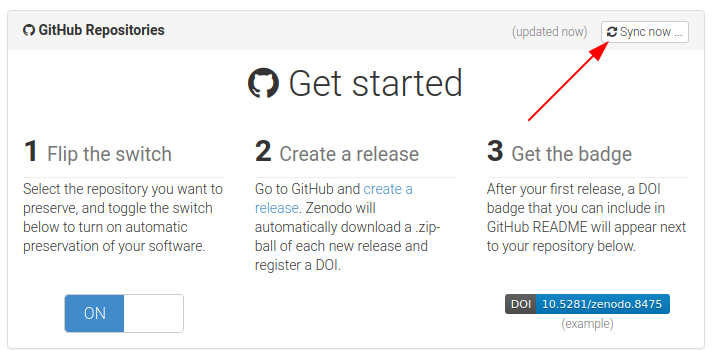
- If it is not there, you may need to “Sync now …”:
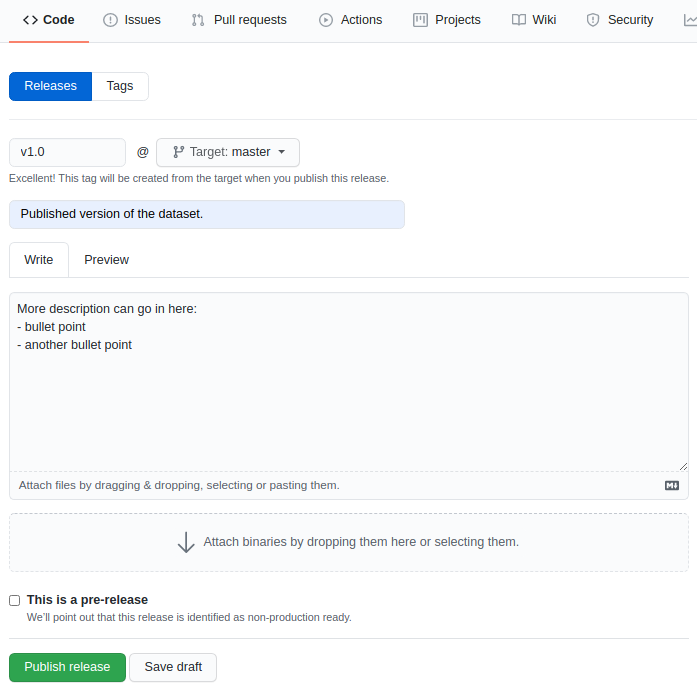
Step 3: Create a “release” and get a DOI
- Go back to the webpage of your GitHub repository
- Click on “releases”:
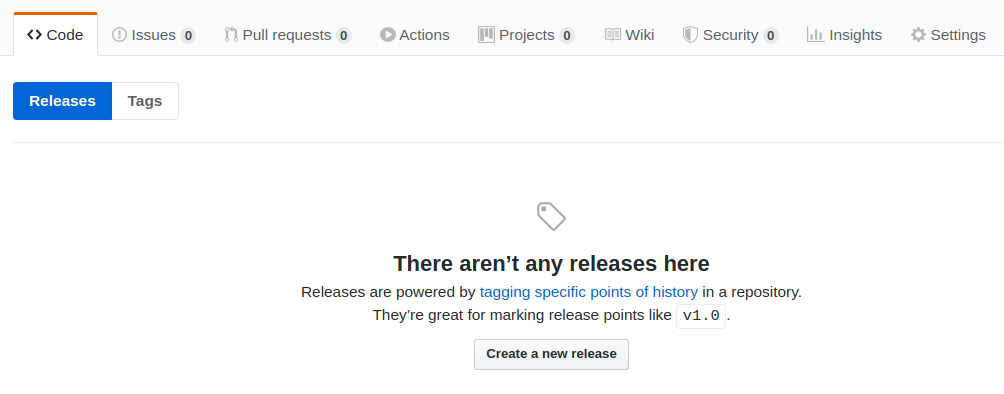
- Fill out the form and click on “Publish release”:
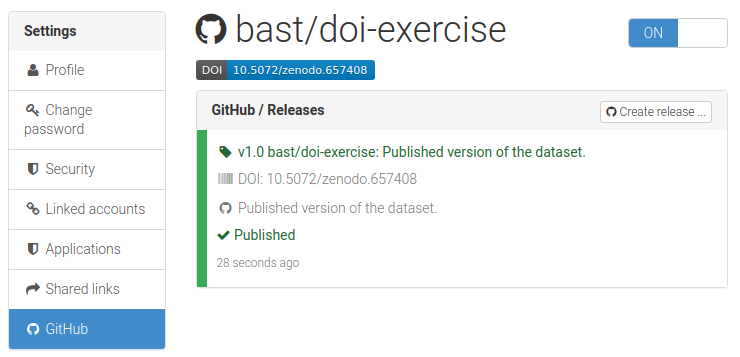
- Finally reload https://sandbox.zenodo.org/account/settings/github/
- It can take few moments for the project to be deposited
- After a while it turns to this:
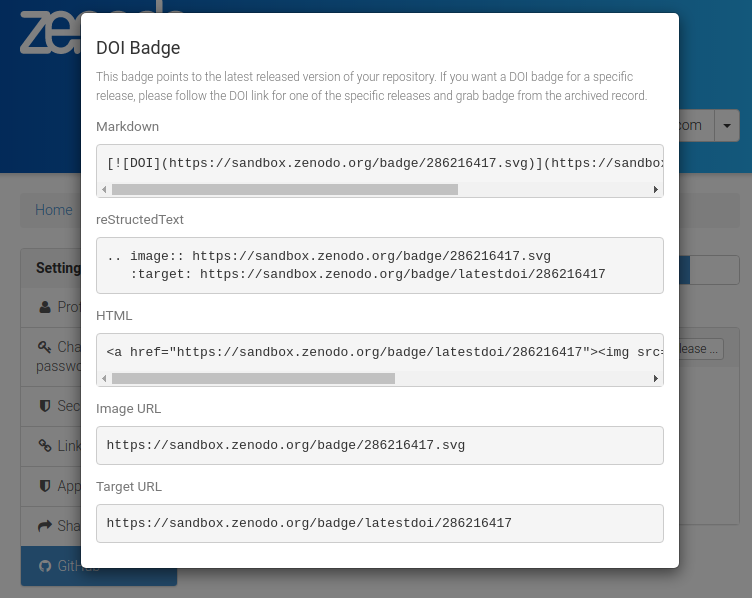
Step 4: Add a DOI badge to your repository
This is bonus but for visitors of your GiHub repository it can be nice to find a badge in your README that informs them about and links to the preserved dataset/code on Zenodo.
- On Zenodo, click on the badge (last figure) which opens up:
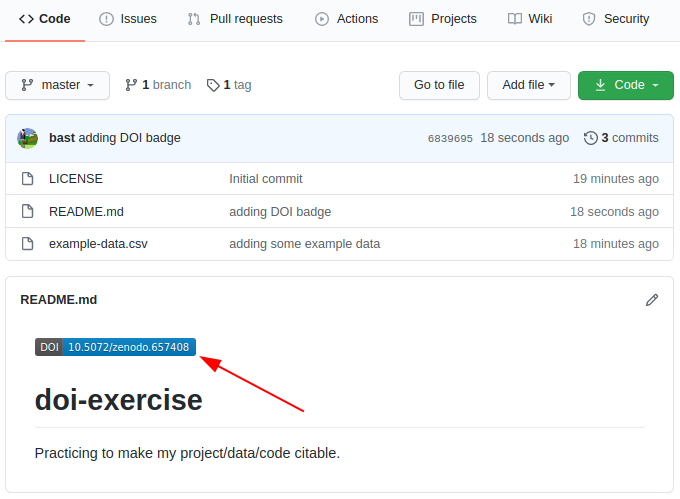
- Try to add such a badge to your README for the exercise repository:
All the materials for this Zenodo section is taken directly from the Collaborating and sharing using GitHub without command line lesson by coderefinery.
Key Points
People who incorporate General Public License (GPL’d) software into their own software must make their software also open under the GPL license; most other open licenses do not require this.
The Creative Commons family of licenses allow people to mix and match requirements and restrictions on attribution, creation of derivative works, further sharing, and commercialization.
People who are not lawyers should not try to write licenses from scratch.
It’s highly recommended to get a digital object identifier (DOI) for your dataset or code